
Xbox 360 repair may not be as hard as you think provided you have some very basic technical repair knowledge and a few simple household repair tools.
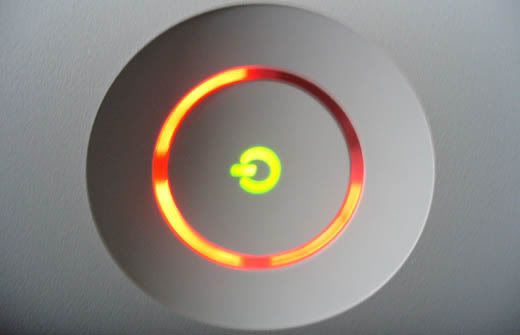
The Xbox problem we are talking about is the 'red ring of death' Many xbox 360 console enthusiasts will know that this is impossible to get rid of without repair.
At this point its worth noting that if your Xbox 360 is still under warranty performing such an Xbox repair could void the warranty. The only problem is, if you send your xbox 360 to be repaired by Microsoft you could be waiting weeks before the repair is complete and you receive your Xbox 360 back.
If your Xbox 360 has past the warranty period, you don't want to wait weeks for it to be repaired or you simply don't want to spend $140 for a Xbox 360 repair the good new is that a full repair can be completed at home.
This guide will explain how to cure the red ring of death problem saving you time and up to $140 in costs for an Xbox 360 repair performed by Microsoft.
This guide is:
-Easy to perform in under 1 hour
-Will not harm your Xbox
-Only very basic knowledge required
-Use household materials to complete repair
Learn To Perform Xbox 360 Repairs And Charge Friend Money?
Yes this is possible, many people are desperate to repair there Xbox and are willing to pay money, learn here and start your own Xbox 360 repair service.
Opening Up The Back Of An Xbox
Great care needs to be taken when opening the case, the cover should literally pop apart, never force it with screw drivers, the chances of breaking the case will be increased.
OK, first thing is to remove the faceplate, this makes everything much easier. Removing the top and bottom plates before this may result in the plastic tabs being broken. Using the finger hole at the bottom of console is a little trick to make things much easier. Pull this forward.

Start with the gray bottom vent plate, there are 6 tabs that hold this in place. These can be accessed through the side vents. Pull the plate forward and at the same time release clips with an opening tool or other tool that can be made to fit into the hole.

The best way is to start from the front and work back applying light pressure along the way pulling it up and away slightly.

The next step is to remove the top plate. There are 6 tabs in total 3 of which aren't easy to access. Remove the first two, where the tabs can be accessed from the relating holes where the drive tray connects. You will find that the opening tool has a cut out which fits perfectly to reach the clips. The other 2 clips can be released and are visible through the vent holes. The final tab has to be released by removing one of the feet on the Xbox to reveal a hole.


With both top and bottom vent covers removed you now lay the Xbox upside down. Because the chassis is screwed to the top, laying it upside down makes it a great deal easier.
Continue taking the case apart by pushing the clips, this should be pretty self explanatory by now and it doesn't require any tools. You may find the case spreads slightly out but does not fully release.

After a series of clicks the case should come free, Splay the back apart a small distance and this should rest open while you spin it around to work on the front.

All you need to do is lift off the lid and now the cover should be off.

Further information will be listed here but at some point you will need to get the full Xbox 360 repair guide. There are a few versions of these around but some provide poor information, this could result in your Xbox being damaged beyond repair.
The best repair guide in terms of accuracy, easiness to follow and value is called the 3 Red Light Fix Repair Guide you can download a copy for instant delivery for $24
With this Xbox 360 repair guide you also get information on how to fix overheating issues, freezing screens, graphics problems and more.